!doctype html public "-//w3c//dtd html 4.0 transitional//en">
ARC Cluster
ARC:
A
Root
Cluster for Research into Scalable Computer Systems
Official Annoucement of the ARC Cluster (local copy)
NCSU write-up on the ARC Cluster (local copy)
TechNewsDailyStory (local copy)
Networking, Power and Cooling:
Pictures

System Status


Software
All software is 64 bit unless marked otherwise.

Obtaining an Account
- for NCSU students/faculty/staff in Computer Science:
- Send an email to your advisor asking for ARC access and indicate your unity ID.
- Have your advisor endorse and forward the email to Neha Gholkar.
- If approved, you will be sent a secure link to upload your
public DSA key for SSH access.
- for NCSU students/faculty/staff outside of Computer Science:
- Send a 1-paragraph project description with estimated compute
requirements (number of processors and compute hours per job per
week) in an email to your advisor asking for ARC access and indicate your unity ID.
- Have your advisor endorse and forward the email to Neha Gholkar.
- If approved, you will be sent a secure link to upload your
public DSA key for SSH access.
- for non-NCSU users:
- Send a 1-paragraph project description with estimated compute
requirements (number of processors and compute hours per job per
week) in an email to your advisor asking for ARC access. Indicate
the domain name that you will login from (e.g., csc.ncsu.edu). In an
attachment, provide a public DSA key (a file named id_dsa.pub) with
a signature of the machine that you will use to access the cluster.
- Have your advisor endorse and forward the email to Neha Gholkar.
- If approved, you will be sent a secure link to upload your
public DSA key for SSH access.

Accessing the Cluster
- Login for NCSU users:
- Login to a machine in the .ncsu.edu domain.
- Then issue:
- Or use your favorite ssh client under Windows from an .ncsu.edu
machine.
- Login for users outside of NCSU:
- Login to the machine that your public key was generated on.
Non-NCSU access will only work for IP numbers that have been
added as firewall exceptions, so please use only the computer
(IP) you indicated to us any other computer will not work.
- Then issue:
- Or use your favorite ssh client under Windows.

Using OpenMP (via Gcc)
-
The "#pragma omp" directive in C programs works.
gcc -fopenmp -o fn fn.c

Running CUDA Programs (Version 7.0)
- Append to your ~/.bashrc:
export PATH=".:~/bin:/usr/local/bin:/usr/bin:$PATH"
export PATH="/usr/local/cuda/bin:$PATH"
export LD_LIBRARY_PATH="/usr/local/cuda/lib64:/usr/local/cuda/lib:$LD_LIBRARY_PATH"
export MANPATH="/usr/share/man:$MANPATH"
Log out and back in to activate the new settings.
- Install the SDK in your directory:
tar xzf /home/rocks/install/contrib/5.3/x86_64/nvidia/7.0/NVIDIA_GPU_Computing_SDK-70.tgz
- Compile the SDK:
cd cuda-7.0/samples
make
- Test the SDK (CUDA programs can and should only be run on compute nodes, not
the login node):
qsub -I
cd cuda-7.0/samples
./bin/linux/release/bandwidthTest
./bin/linux/release/matrixMul
- Running on the cluster: see Torque below for details
- qsub -q cuda ... # job submitted to GPU/CUDA queue (GTX480/C2050/C2070) -- compromise between single/double precision performance
- qsub -q gtx480 ... # job submitted to GPU/CUDA queue (GTX480) -- best for single precision arithmetic
- qsub -q c2050 ... # job submitted to GPU/CUDA queue (C2050/C2070) -- best for double precision arithmetic
- qsub -l nodes=2:ppn=1 -q cuda ... # job for two tasks on two nodes with GPU/CUDA support
- Tools for Developing/Debugging CUDA Programs
- cuda-gdb (CUDA debugger)
- nsight (Ecplise for CUDA) -- need to use "qsub -I -X..." on compute nodes!
- NVML API for GPU device monitoring
- GPUDirect (MVAPICH2 required)
- see
Keeneland's GPUDirect documentation on how to enhance your program/compile/run
- see
Jacobi example for OpenACC directives exploiting GPUDirect
- example with 2 nodes GPUDv3 device-to-device RDMA
- set paths for CUDA and MVAPICH2 (using gcc or pgi)
- export MV2_USE_CUDA=1
- mpirun -np 2 /usr/mpi/pgi/mvapich2-1.9/tests/osu-micro-benchmarks-4.0.1/osu_latency -d cuda D D

Running MPI Programs with Open MPI and Gcc (Default)

Running MPI Programs with MVAPICH and Gcc (Alternative)
- Create the file hostfile.
- Append to your file ~/.bashrc:
export PATH="/usr/mpi/gcc/mvapich-1.2.0/bin:$PATH"
export LD_LIBRARY_PATH="/usr/mpi/gcc/mvapich-1.2.0/lib/shared:$LD_LIBRARY_PATH"
Log out and back in to activate the new settings.
-
Compile MPI programs:
mpicc -O3 -o pi pi.c
-
Execute the program on 2 processors (using MVAPICH):
qsub -I -l nodes=2
mpirun -np 2 -hostfile $PBS_NODEFILE pi
- Notice: You need to be on a compute node to run with MVAPICH as it
uses Infiniband (no support for any other protocols provided).
- MVAPICH2: Append to your file ~/.bashrc:
export PATH="/usr/mpi/gcc/mvapich2-1.9/bin:$PATH"
export LD_LIBRARY_PATH="/usr/mpi/gcc/mvapich2-1.9/lib:$LD_LIBRARY_PATH"
export LD_LIBRARY_PATH="/usr/local/cuda/lib64:/usr/local/cuda/lib:/usr/local/lib:$LD_LIBRARY_PATH"
Log out and back in to activate the new settings.

MPI Job Submission with Torque (Default)
Batch submission is realized via
Torque
via OpenPBS over the
Maui
Cluster Scheduler.
- On login-0-0, issue:
- to submit: qsub ...
- qsub -q cuda ... # job submitted to GPU/CUDA queue (GTX480 or C2050) -- compromise between single/double precision performance
- qsub -q gtx480 ... # job submitted to GPU/CUDA queue (GTX480) -- best for single precision arithmetic
- qsub -q c2050 ... # job submitted to GPU/CUDA queue (C2050) -- best for double precision arithmetic
- qsub -l ncpus=4 ... # ask for four tasks (processors) -- packed as up to 16 tasks per node
- qsub -l nodes=4:ppn=16 ... # job for four nodes with 16 processors on each node (64 tasks)
- qsub -l nodes=2:ppn=1 -q cuda ... # job for two tasks on two nodes with GPU/CUDA support
- qsub -l nodes=2,cput=00:5:00 ... # job for two tasks + 5 minutes CPU time
- qsub -l nodes=2,walltime=01:00:00 ... # job for two tasks + 1 hour wall time
- qsub -W depend=afterany:1234 ... # job starts after job 1234 has finished (successfully or not)
- to submit interactive: qsub -I # one node, shell will open up
- to submit interactive: qsub -I -nodes=20 #two nodes w/ 20 tasks
- to submit interactive: qsub -I -l host=compute-0-54.local #specifically on node 54
- to submit interactive: qsub -I -l host=compute-0-54.local+compute-0-55.local #on 54+55
- to submit interactive with X11: qsub -I -X ...
- to check job status (PBS): qstat
- to check job queues (Maui): showq ...
- to remove: qdel ...
- to check node status: pbsnodes ...
- see documentation: "man pbs", qsub and Torque link above
- Sample job script for Open MPI
- Sample job script for MVAPICH
- to run a command on all nodes of a job: pbsdsh ...

Using the PGI compilers V13.9 (Alternative)
(includes OpenMP and CUDA support via pragmas, even for Fortran)
- Append to your ~/.bashrc:
PGI=/usr/local/pgi; export PGI
PATH=/usr/local/pgi/linux86-64/13.9/bin:$PATH
LD_LIBRARY_PATH=/usr/local/pgi/linux86-64/13.9/libso:$LD_LIBRARY_PATH
MANPATH=$MANPATH:$PGI/linux86/13.9/man
LM_LICENSE_FILE=/usr/local/pgi/license.dat
export LM_LICENSE_FILE PATH
Log out and back in to activate the new settings.
- For Fortran 77, use: pgf77 -V x.f
- For Fortran 95, use: pgf95 -V x.f
- For HPF, use: pghpf -V x.f
- For C++, use: pgCC -V x.c
- For ANSI C, use: pgcc -V x.c
- For debugging, use: pgdbg
- For AMD 64-bit, add option: -tp=barcelona-64
- For OpenMP, add option: -mp
- For OpenACC/CUDA, add options: -acc -ta=nvidia,cc20
- For OpenACC/CUDA 5.5, not working: -acc -Mcuda=cuda5.5,rdc -ta=nvidia,cc20
- For OpenACC/CUDA on Kepler, add options: -acc -ta=nvidia,cc35
- with filename.f: supports Fortran ACC pragmas (for CUDA), e.g.,
!$acc parallel
- with filename.c: supports C ACC pragmas (for CUDA), e.g.,
#pragma acc parallel
- For Fortan+OpenACC/CUDA, add options: -D__align__(n)=__attribute__((aligned(n))) -D__location__(a)=__annotate__(a) -acc -Mcuda=cuda5.0,rdc -ta=nvidia,cc20
- Slides and
excercises on MPI+GPU programming with CUDA and OpenACC
- PGI Documentation
- OpenAcc Documentation
- PGI+Open MPI, append to your ~/.bashrc:
export PATH="/usr/mpi/pgi/openmpi-1.5.4/bin:$PATH"
export LD_LIBRARY_PATH="/usr/mpi/pgi/openmpi-1.5.4/lib64:$LD_LIBRARY_PATH"
- PGI+MVAPICH: Append to your file ~/.bashrc:
export PATH="/usr/mpi/pgi/mvapich-1.2.0/bin:$PATH"
export LD_LIBRARY_PATH="/usr/mpi/pgi/mvapich-1.2.0/lib/shared:$LD_LIBRARY_PATH"
Log out and back in to activate the new settings.
- PGI+MVAPICH2: Append to your file ~/.bashrc:
export PATH="/usr/mpi/pgi/mvapich2-1.9/bin:$PATH"
export LD_LIBRARY_PATH="/usr/mpi/pgi/mvapich2-1.9/lib:$LD_LIBRARY_PATH"
Log out and back in to activate the new settings.

Dynamic Voltage and Frequency Scaling (DVFS)
- Change the frequency/voltage of a core to save energy (without
any of with minor loss of performance, depending on how memory-bound
an application is)
- Use cpufreq
and its
utilities
to change processor frequencies
- Example for core 0 (requires sudo rights):
- cpufreq-info
- sudo cpufreq-set -c 0 -g userspace
- sudo cpufreq-set -c 0 -f 1200Mhz
- cpufreq-info -c 0

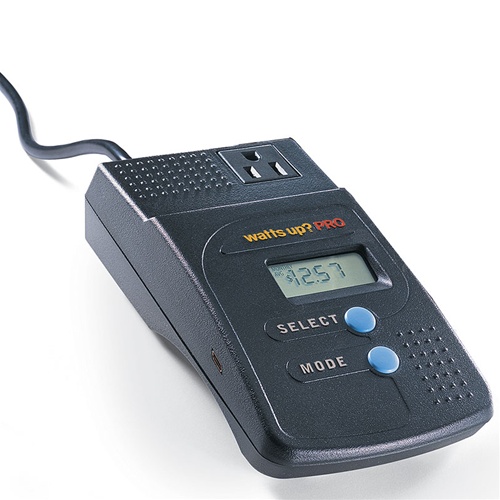
Power monitoring
Sets of three compute nodes share a power meter; in such a set,
the lowest numbered node has the meter attached (either on the serial
port or via USB). In addition, two individual compute nodes have power
meters (with different GPUs). See
this power wiring diagram to identify
which nodes belong to a set. The diagram also indicates if a meter
uses serial or USB for a given node. We recommend to explicitly
request a reservation for all nodes in a monitored set (see qsub
commands with host name option). Monitoring at 1Hz is accomplished
with the following software tools (on the respective nodes where
meters are attached):

Virtualization with KVM
Virtualization support is realized via KVM.
Follow instructions for VM creation and see the MAC guidelines for network connectivity.

Lustre

PVFS2
- Mounted as /pvfs2
- about 36TB of storage over 4 servers (9.2TB each) under software RAID0
- Currently limited by 1Gpbs switch connection (eth1)

PAPI
- Reads hardware performance counters
- Check supported counters: papi_avail
- Edit your source file to define performance counter events,
read them and then print or process them, see
PAPI API
- Add to the Makefile compile options: -I/usr/local/include
- Add to the Makefile linker options: -L/usr/local/lib -lpapi
- export LD_LIBRARY_PATH="$LD_LIBRARY_PATH:/usr/local/lib"

likwid
Hadoop Map-Reduce and Spark
Simple setup of multi-node
Hadoop map-reduce with HDFS, see
also free
AWS setup as an alternative and the original single
node and
cluster
setup. But follow the instructions below for ARC. Other
components, e.g., YARN, can be added to the setup below as well (not
covered).
#distr config, subsitute MY-UNITY-ID with your login ID
mkdir hadoop
cd hadoop
mkdir -p etc/hadoop
cd etc/hadoop
#create core-site.xml
<configuration>
    <property>
        <name>fs.defaultFS</name>
        <value>hdfs://compute-0-X:9000</value>
    </property>
</configuration>
#create hdfs-site.xml
<configuration>
    <property>
        <name>dfs.replication</name>
        <value>1</value>
    </property>
    <property>
        <name>dfs.datanode.data.dir</name>
        <value>/tmp/MY-UNITY-ID/name/data</value>
    </property>
    <property>
        <name>dfs.namenode.name.dir</name>
        <value>/tmp/MY-UNITY-ID/name</value>
    </property>
</configuration>
#create mapred-site.xml
<configuration>
   <property>
      <name>mapred.job.tracker</name>
      <value>compute-0-X:9001</value>
   </property>
</configuration>
#create masters
compute-0-X
#create slaves
compute-0-X
compute-0-Y
#etc.

#for each compute-0-X/Y/..., create directories
ssh compute-0-X rm fr /tmp/MY-UNITY-ID
ssh compute-0-X mkdir -p /tmp/MY-UNITY-ID
ssh compute-0-Y rm fr /tmp/MY-UNITY-ID
ssh compute-0-Y mkdir -p /tmp/MY-UNITY-ID
...

cd ../..
mkdir bin
cd bin
ln -s /usr/local/hadoop/bin/* .
cd ..
mkdir libexec
cd libexec
ln -s /usr/local/hadoop/libexec/* .
cd ..
mkdir sbin
cd sbin
ln -s /usr/local/hadoop/sbin/* .
cd ..
ln -s /usr/local/hadoop/* .

export HADOOP_HOME=`pwd`
export HADOOP_COMMON_LIB_NATIVE_DIR=$HADOOP_INSTALL/lib/native
export HADOOP_OPTS="-Djava.library.path=$HADOOP_INSTALL/lib/native"
export PATH="$PATH:$HADOOP_HOME/bin"

#distr test: You will get warnings and ssh errors for some command, igore them for now
hdfs getconf -namenodes
rm -fr ~/dfs
hdfs namenode -format
sbin/start-dfs.sh
hdfs dfs -mkdir /user
hdfs dfs -mkdir /user/MY-UNITY-ID
hdfs dfs -put /usr/local/hadoop/etc/hadoop input
hadoop jar share/hadoop/mapreduce/hadoop-mapreduce-examples-2.7.2.jar grep input output 'dfs[a-z.]+'
hdfs dfs -get output output
cat output/*
sbin/stop-dfs.sh
To get rid of ssh errors, you need to add a secondary node server and
other optional services. This is not required, it's an option.
You can also run Spark on top of
Hadoop as follows, which will also default to the HDFS file system:
export SPARK_DIST_CLASSPATH=$(hadoop classpath)
export SPARK_HOME=/usr/local/spark
$SPARK_HOME/bin/run-example SparkPi 10
Advanced topics (pending)
For all other topics, access is restricted. Request a root password.
Also, read this documentation, which is only
accessible from selected NCSU labs.
This applies to:
- booting your own kernel
- installing your own OS
Known Problems
Consult the FAQ. If this does not help, then
please report your problem.
References:
- A User's
Guide to MPI by Peter Pacheco
- Debugging: Gdb only works on one task with MPI, you need to
"attach" to other tasks on the respective nodes. We don't have
totalview (an MPI-aware debugger). You can also use
printf debugging, of course. If your program SEGVs, you can
set ulimit -c unlimited and run the mpi program again, which
will create one or more core dump files (per rank)
named "core.PID", which you can then debug: gdb binary and
then core core.PID.
Additional references:


